OpenLiteSpeed, PHP 7 & MariaDB on Debian Jessie
I tried to setup HHVM on the DO droplet, but could not do so as it required at least 1GB RAM to be capable of running. So I decided to try and run it on a dedicated server I had with Kimsufi and to be honest I wasn’t very impressed as there wasn’t any notable difference between Apache 2 & HHVM and Apache 2 & PHP 7.
But, for quite a long time I intended to run OpenLiteSpeed and with the dedicated server empty I said I’d give it a go especially after reading a very interesting blog post regarding the performance of various webserver setups.
I followed the official install tutorial for OpenLiteSpeed, but ended up having to install additional packages in order to be able to compile PHP 7 correctly so I decided to write this basic tutorial on installing OpenLiteSpeed with PHP 7 and MariaDB on a Debian Jessie.
First we need to get the repo info and enable it for apt and we can do that with the command below:
wget -O – http://rpms.litespeedtech.com/debian/enable_lst_debain_repo.sh | bash
The script will automatically setup everything, update apt and there is no interaction needed.
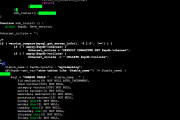
Now, that we have the repo setup we can simply use apt-get to install both OpenLiteSpeed and the PHP 5.6 that was built for OpenLiteSpeed with the command below:
apt-get install openlitespeed lsphp56-*
Then we create a symlink for PHP as follows:
ln -sf /usr/local/lsws/lsphp56/bin/lsphp /usr/local/lsws/fcgi-bin/lsphp5
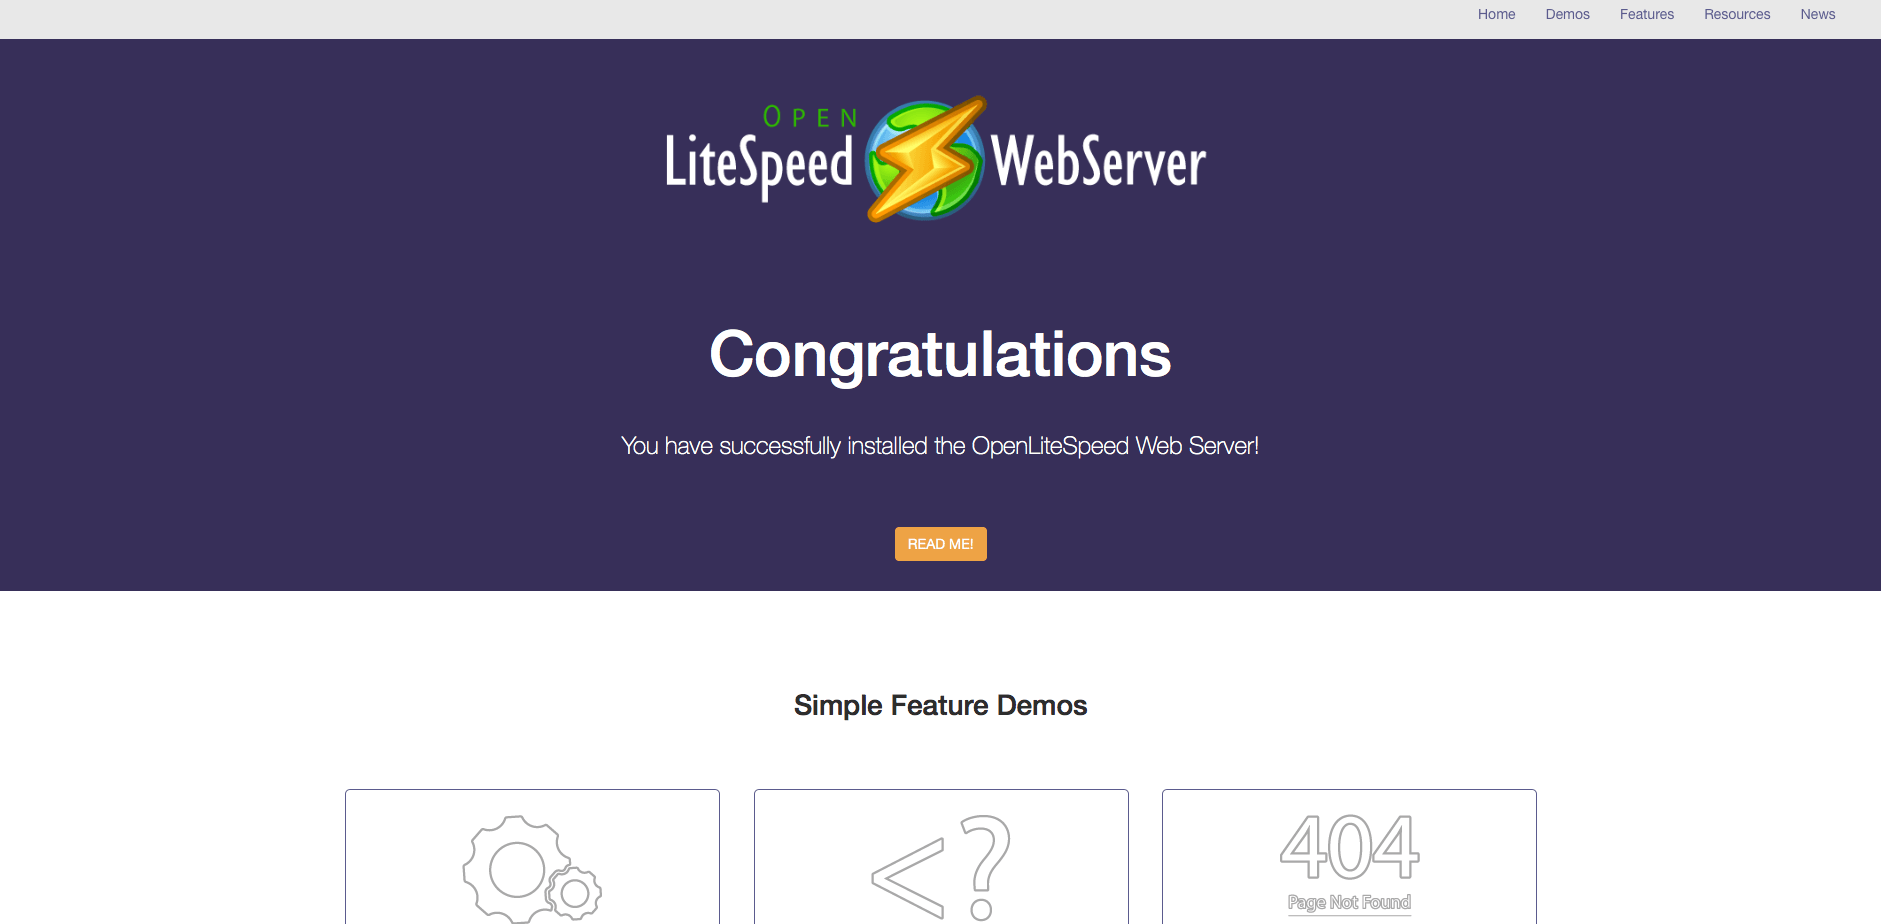
At this point OpenLiteSpeed should be up and running on the server and it’s functionality can be checked by accessing the server’s IP or hostname in the browser, followed by port 8088 (default http port for OpenLiteSpeed): http://serverip-or-hostname:8088. If everything was setup correctly we should be prompted by a message like the one below:
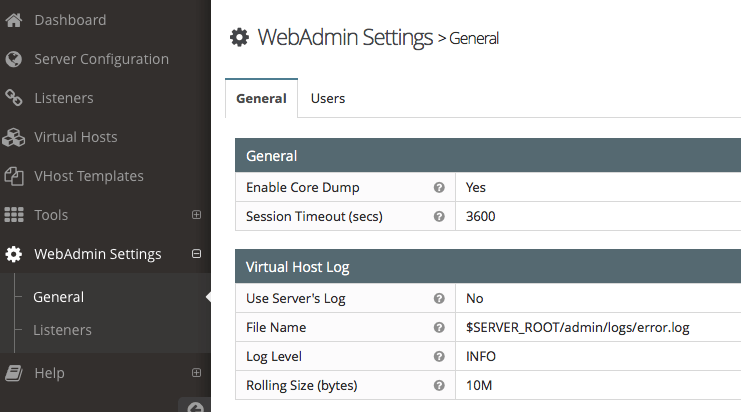
The admin panel for OpenLiteSpeed can be accessed by switching the port to 7080: http://serverip-or-hostname:7080. The panel relies on a self-signed SSL and will use encryption, but the default username is admin and the default password is 123456 so the first thing you have to do is to access the WebAdmin Settings > General > Users; and change your username and password, then restart the server using the green restart icon situated on the top right:
Once the password has been changed and the server was restarted we can move onto compiling PHP 7 (if you’re happy with PHP 5.6 and you want your site to be slow and insecure you can skip to the MariaDB instructions). It can be installed from the repo too, but I prefer compiling it so that it works at highest efficiency with the server setup and available environment. On a minimal or net-install the built in compilation script will fail due to certain dependencies so first things first, we install the dependencies needed to build PHP 7 using the command below:
apt-get install libmcrypt-dev libcurl4-gnutls-dev pkg-config build-essential
Once all dependencies have been installed we can compile PHP 7 using Tools > Compile PHP.
NOTE: Step 3 of the PHP 7 compilation assumes that the following command is executed via the terminal: /usr/local/lsws/phpbuild/buildphp_manual_run.sh
This is due to security reasons and you will be prompted for it.
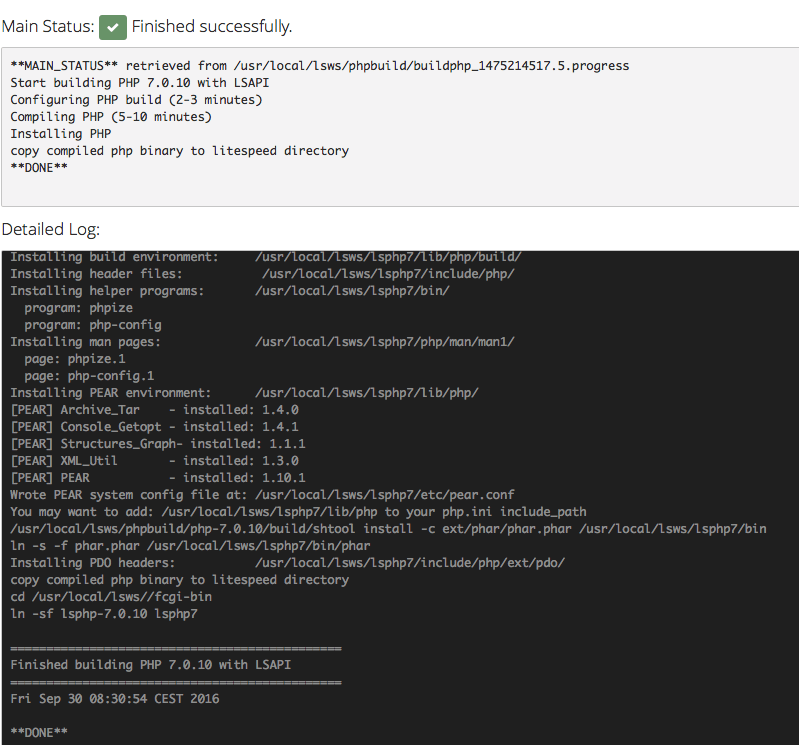
After you execute the command in the terminal you should monitor the progress via the web interface and once the build is completed correctly the web interface should display as follows:
Next, for PHP 7 to be executed by default you must go to Server Configuration > External App; and edit the LiteSpeed SAPI App type. There just replace both instances of lsphp5 with lsphp7 and you’re all set.
With the PHP 7 build completed we can move onto the MariaDB installation which is pretty basic and only assumes installing MariaDB from the repository:
apt-get install mariadb-client mariadb-server
Sometime throughout the installation process you will be prompted to fill in your MySQL root password. You’ll have to do it twice and save that password as you will need it later on to create databases and users.
That’s about it. Were you expecting more? There is more, but it’s going to be discussed in upcoming posts where I will explain how to create vhosts and setup Let’s Encrypt.

Written by Malin
Self taught IT enthusiast with over 16 years of online background experience. On top of that I'm a blogger, webmaster, husband and father.